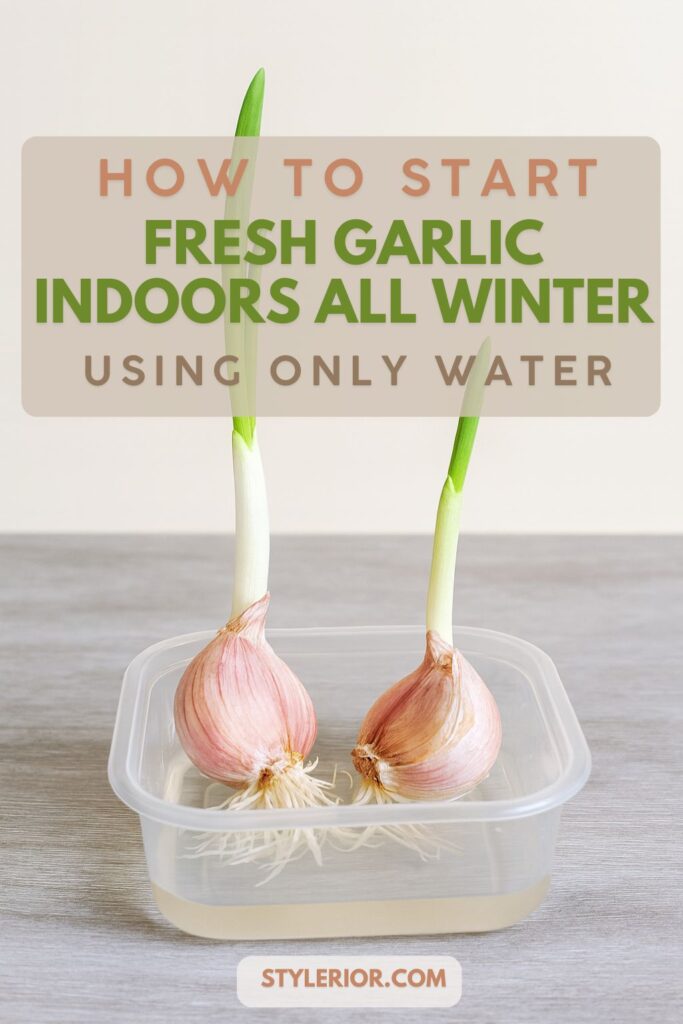
Winter may pause the outdoor garden, but it doesn’t have to pause your gardening altogether. Many plants actually sprout beautifully indoors when given the right conditions—and garlic is one of the easiest. While traditional gardeners associate planting garlic with crisp fall soil and a long growing season, there’s a surprisingly simple way to get those cloves started long before spring arrives. All you need is a healthy bulb, a bright windowsill, and a plain bowl of water.
Growing garlic in water uses basic hydroponic principles, allowing the cloves to sprout without any soil at all. This method isn’t meant to produce full garlic heads—those still require outdoor conditions and a proper growing season. Instead, it offers a fast, beginner-friendly way to start strong, rooted cloves for spring planting or to grow flavorful garlic greens you can harvest right from your kitchen.
Below is a step-by-step guide to starting garlic in winter, keeping the sprouts healthy, and transitioning them successfully into the garden once warm weather returns.
Why Garlic Sprouts Indoors So Easily
If you’ve ever noticed garlic sprouting when stored in a humid pantry, you’ve already seen how little encouragement it needs. Bulbs naturally respond to moisture and ambient warmth, and winter indoor environments often provide just that. Growing cloves in water simply channels this natural response into a more controlled—and productive—process.
Hydroponic sprouting also helps you:
- Jump-start the growing season before the ground has thawed
- Avoid cold damage and fungal issues common in winter soil
- Produce tender garlic greens for cooking
- Prepare sturdy, rooted cloves for spring transplanting
The key, however, is starting with the right bulbs and giving them the proper setup.
How to Prepare and Start Garlic in Water
Choose High-Quality Bulbs
Your success begins with healthy planting stock. Select garlic bulbs that feel firm and plump, with no soft spots, mold, or shriveling. Larger cloves—especially the outer ones—tend to produce stronger roots and more vigorous greens.
Avoid bulbs that look dehydrated or ones that have lost their papery outer skin. These are more prone to rotting when placed in water.
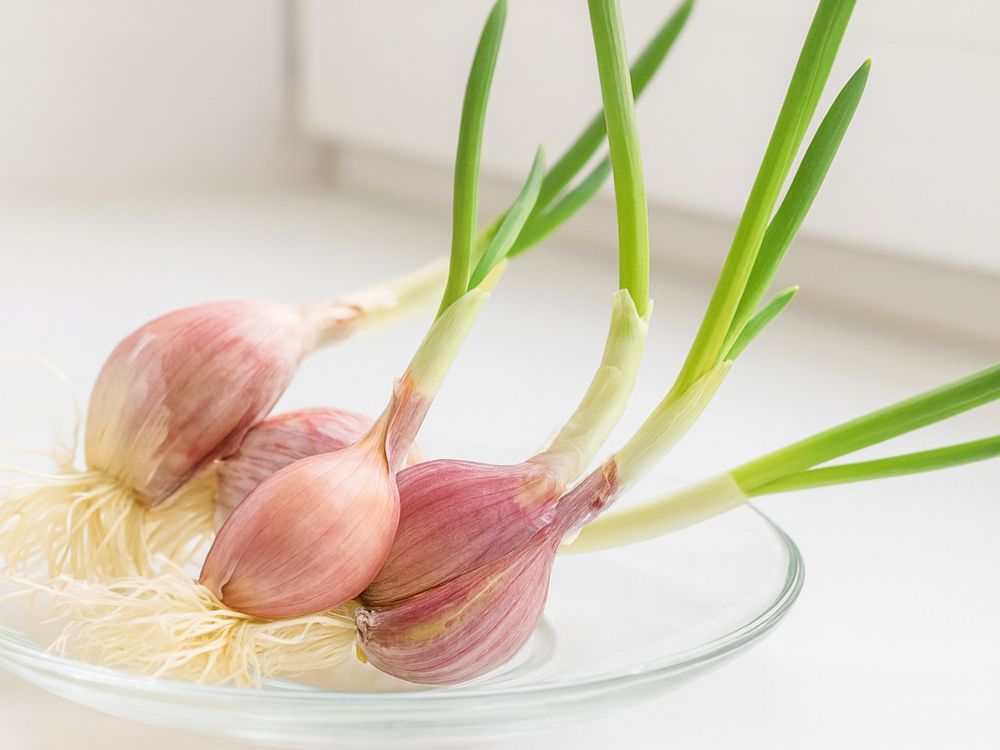
Separate the Cloves Carefully
Right before sprouting, break apart the bulb into individual cloves. Doing this too early causes the cloves to dry out and reduces their chances of rooting.
When separating, make sure each clove keeps:
- Its papery wrapper
- Its intact basal plate (the flat area where roots emerge)
Damaged basal plates often fail to sprout or rot quickly in water.
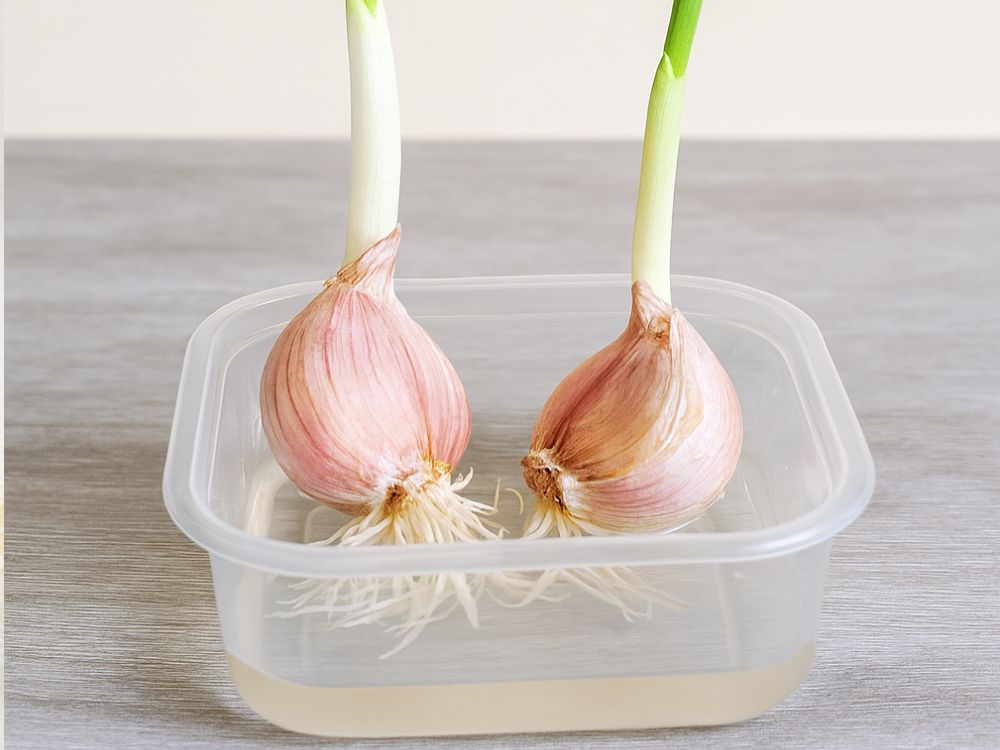
Set Up Your Water Bowl
Choose a shallow, wide bowl—something that lets the cloves sit comfortably without being submerged. Add just enough water to touch the very base of each clove. Only the root end should make contact with the water; if the entire clove sits underwater, it’s likely to rot.
Optional: Add a layer of pebbles or marbles at the bottom. Place the cloves on top so only their root tips reach the water.
Provide Light and Fresh Water
Place the bowl in a bright spot, ideally near a south- or east-facing window. Garlic doesn’t need intense sunlight, but it does benefit from a consistent light source.
Change the water every couple of days or anytime it looks cloudy. Remove the cloves carefully, rinse the bowl, and refill with fresh water.
Within just a few days, you’ll see threadlike roots forming. Soon after, bright green shoots will begin growing upward.
Caring for Garlic Sprouts Indoors
Indoor garlic sprouts are surprisingly low-maintenance. Keep them in a bright location, rotate the bowl occasionally so the shoots don’t lean, and maintain clean water to prevent bacteria from forming.
If you plan to use the greens in cooking, you can snip the tops once they reach a few inches tall. They grow back slowly, so regular harvesting isn’t advised—but trimming here and there adds fresh garlic flavor to soups, salads, omelets, and stir-fries.
If your goal is to transplant outdoors in spring, allow the shoots and roots to fully develop before moving them to soil.
Transitioning Water-Sprouted Garlic to the Garden
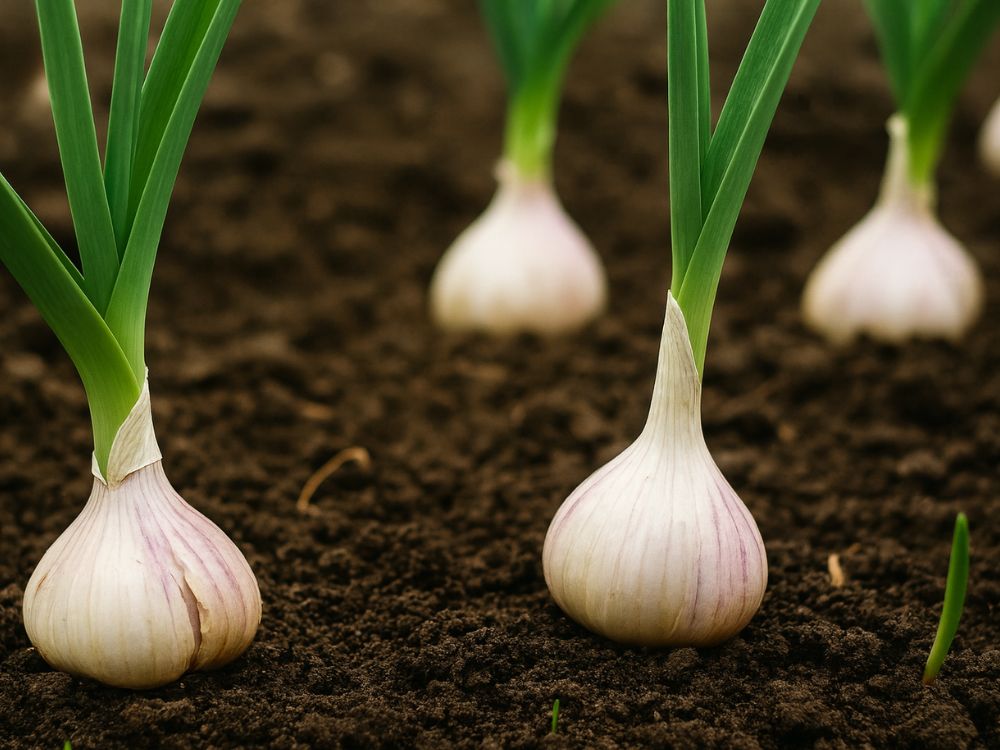
Once each clove has a strong root system and several inches of healthy green growth, it’s ready to be planted in soil. This transition requires gentle handling and a bit of preparation.
Give Sprouts Time to Adjust
Before moving your garlic outdoors permanently, take them through a short hardening-off period. This means gradually exposing the sprouts to real outdoor conditions—sunlight, breeze, and temperature changes—over the span of about a week.
This step prevents transplant shock, which can stunt growth or kill young plants.
Prepare the Soil
Garlic grows best in:
- Loose, well-drained soil
- High organic matter (compost works beautifully)
- Full sun exposure
- Moist but not soggy conditions
Raised beds or garden rows that warm up early in spring are excellent options.
Plant the Garlic Cloves
When the soil is workable and the danger of deep frost has passed, plant the sprouted cloves root-side down. Space them 6–8 inches apart and bury them about 2 inches deep.
After planting:
- Water thoroughly to settle the soil
- Keep the area evenly moist (about 1 inch of water per week)
- Avoid overwatering, which can cause bulb rot
With good soil and consistent care, water-sprouted cloves often produce stronger plants because they get a head start on root development indoors.
What Results to Expect
Sprouting garlic in water won’t yield full bulbs indoors, but it is an efficient way to:
- Start garlic long before planting season
- Produce fresh garlic greens in winter
- Grow seedlings that transition into robust outdoor plants
- Make use of pantry bulbs that might otherwise go to waste
When transplanted, these early-started cloves often grow into healthier, fuller plants that mature more reliably through the growing season.
Starting garlic in winter using nothing more than a bowl of water is one of those simple, satisfying gardening projects that anyone can try—no soil, no mess, no special equipment. Whether you’re growing flavorful greens for your kitchen or prepping future bulbs for your garden, this method brings a touch of spring into your home long before the snow melts outside.