
Open shelving has become a hallmark of contemporary interiors, admired for its spacious vibe but sometimes tricky to manage day-to-day. Through years of collaborating with clients on open shelf installations, I’ve noticed a distinct difference between the flawless arrangements seen online and the realities of everyday use. This manual will guide you through designing and sustaining open shelves that are both attractive and compatible with real life.
Embracing the Open Shelf Mindset

Before we discuss arrangement strategies, it’s important to recognize what open shelving truly involves. Opting for open shelves is more than a design preference—it’s a lifestyle shift that impacts how you sort, display, and care for your possessions.
Honest Advantages and Drawbacks
After designing open shelving for spaces ranging from compact city flats to large rural homes, here’s a candid overview:
Advantages:
- Enhances a room’s sense of space and openness, especially in smaller kitchens
- Lets you highlight decorative pieces and treasured collections
- Makes frequently used items more accessible
- Usually more budget-friendly than traditional cabinets
- Encourages you to use special items by keeping them visible
- Can make rooms appear larger and more open
Drawbacks:
- Needs frequent cleaning to keep dust at bay
- Can look messy if not thoughtfully arranged
- Best suited for items that match or coordinate (miscellaneous items may need to be hidden)
- Lower shelves may not be ideal if you have young kids
- Requires ongoing organization and tidiness
A project with a bustling family of five perfectly illustrated the gap between visual appeal and everyday practicality. Although they were initially excited to fill their kitchen with open shelves, the demands of daily maintenance quickly set in. Within just three months, they asked to swap out half of the open shelving for conventional cabinets. This experience is a clear reminder that, while open shelving can be stunning, it needs to suit your real-life habits—not just your design dreams.
Preparing for Your Open Shelving Installation
Assessing Your Space and Requirements
Before mounting any shelves, consider these key questions:
- What will these shelves hold? This affects spacing and support.
- Where will they be installed? Think about sightlines and how they fit with the room’s design.
- Are there secure points for mounting? Anchoring into studs is essential for stability.
- How often will you use the items displayed? Everyday items gather less dust.
Choosing the Right Materials
Different shelf materials offer unique looks, strengths, and maintenance needs:
| Material | Look | Durability | Care | Best Use |
|---|---|---|---|---|
| Solid Wood | Warm, organic | High | Medium (may need occasional oiling) | Kitchens, living rooms |
| Glass | Sleek, airy | Moderate | High (shows smudges) | Bathrooms, display shelves |
| Metal | Modern, industrial | Very high | Low | Kitchens, utility rooms |
| Aluminum/Glass | Contemporary | High | Medium | Modern offices, studios |
| Marble | Elegant, upscale | Moderate | High (needs sealing) | Kitchens, bathrooms |
For most homes, we often recommend solid wood. As one client put it, “Wood shelves are like classic jeans—they age beautifully and work with everything.”
Real-World Styling Techniques for Open Shelves
1. Begin with a Blank Canvas
To begin styling your shelves, start by clearing everything off or emptying the area where the shelves will go. This gives you the chance to:
- Clean the surfaces thoroughly before arranging anything
- Bring all possible decor items together to see what combinations work best
- Decide on a palette of three or four main colors that enhance your space
- Choose pieces that are both visually appealing and serve a purpose
From experience, trying to style shelves by adding items bit by bit usually results in a scattered, uncoordinated look that often needs to be redone from scratch. Completely emptying the space first has become an essential first step for achieving a harmonious and unified arrangement.
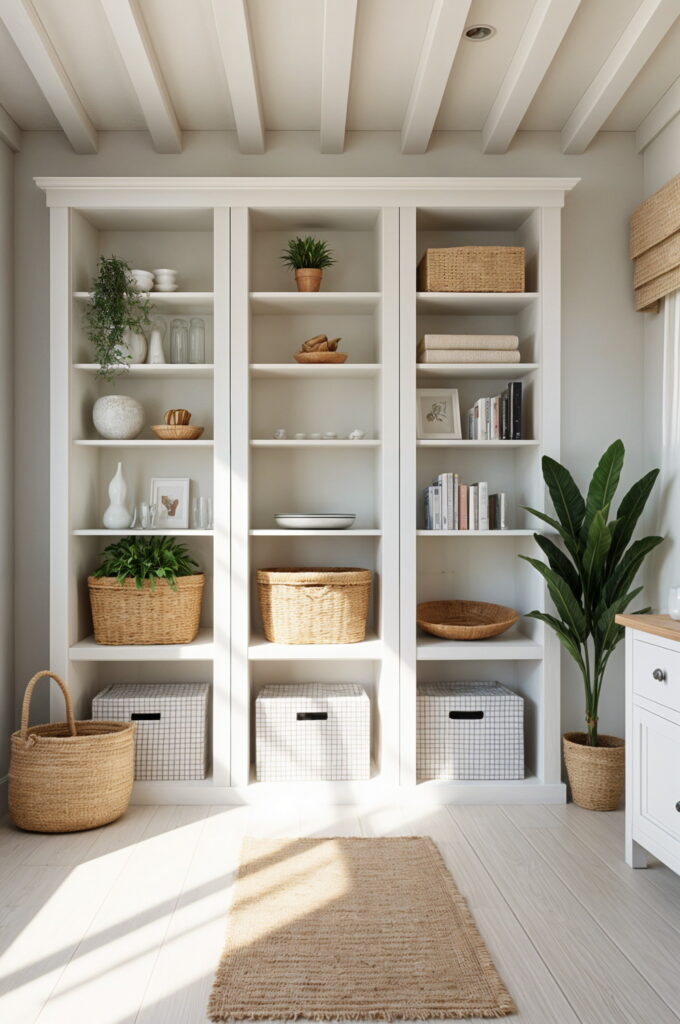
2. Master the Art of Layering
Effective shelf displays use strategic layering:
- Start with foundation pieces – Place the largest or most prominent items first
- Add depth – Arrange objects at different depths, putting bigger items toward the back
- Group in odd numbers – Sets of three or five are visually appealing
- Vary height and texture – Mix tall, medium, and short objects for interest
A highly effective approach is to incorporate small pieces of art as a backdrop on your shelves. This simple addition immediately adds depth and draws the eye, which is especially helpful in kitchens where creating a sense of dimension can be tricky.
3. Blending Function and Style in the Kitchen

Kitchen shelves require thoughtful organization to strike the right balance between everyday usability and visual harmony:
- Keep your most-used items—like plates, glasses, and mugs—on shelves within easy reach
- Opt for dishware in a unified color scheme, such as all white or a coordinated set of hues
- Use cookbooks as both practical resources and attractive accents
- Introduce small potted herbs or plants to bring freshness and a pop of color
In my own kitchen makeover, I reserved open shelves exclusively for daily essentials – white dishes, clear glassware, and my go-to mugs — while everything else was tucked away behind cabinet doors. This approach has consistently helped maintain an organized, beautiful, and functional space.
Open Shelf Styling by Room
Kitchen Shelves
What Works Best:
- Everyday dishware in matching or harmonious colors
- Cooking tools you use regularly
- Glass containers for storing dry goods
- Cookbooks
- Small potted herbs or plants
Real-Life Example:
A recent kitchen redesign perfectly demonstrates the effectiveness of a minimalist approach. Only daily essentials were placed on the shelves, all chosen in a consistent color palette to keep the space looking organized and uncluttered. Both the dinnerware and glassware matched in color, creating a serene and cohesive atmosphere.
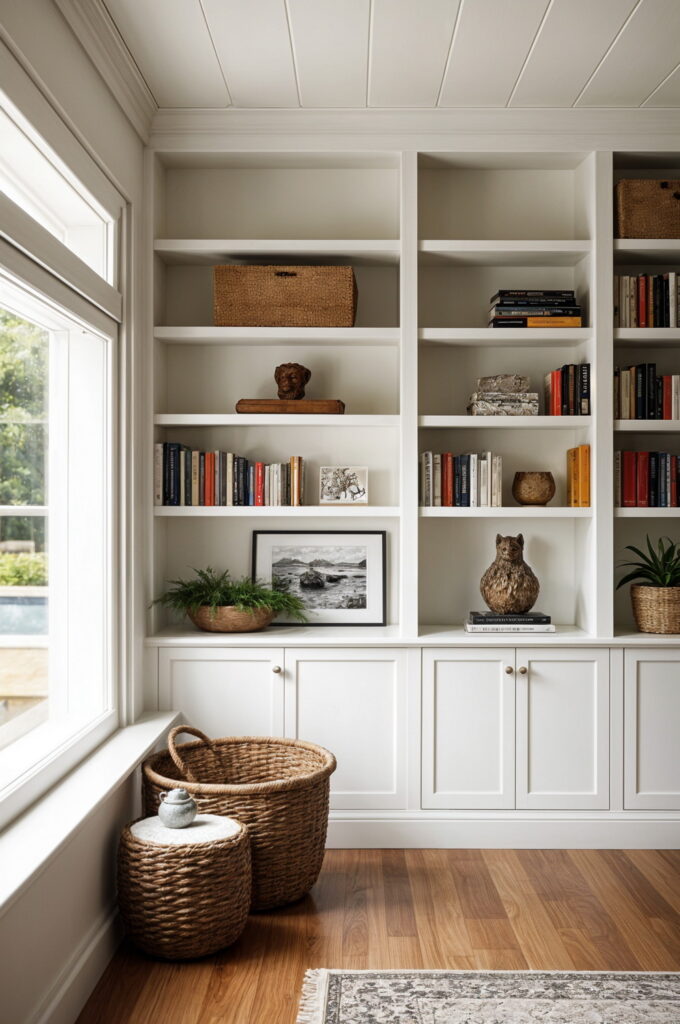
Living Room or Office Shelving
Ideal Items:
- Books (stacked vertically and horizontally)
- Framed pictures or art
- Decorative sculptures
- Houseplants
- Boxes for hiding small clutter
For living areas, a helpful rule of thumb is the “60-30-10” approach: dedicate about 60% of your shelf space to practical items such as books and storage boxes, reserve 30% for decorative accents, and use the remaining 10% for personal touches like keepsakes or photos.
Bathroom Shelves
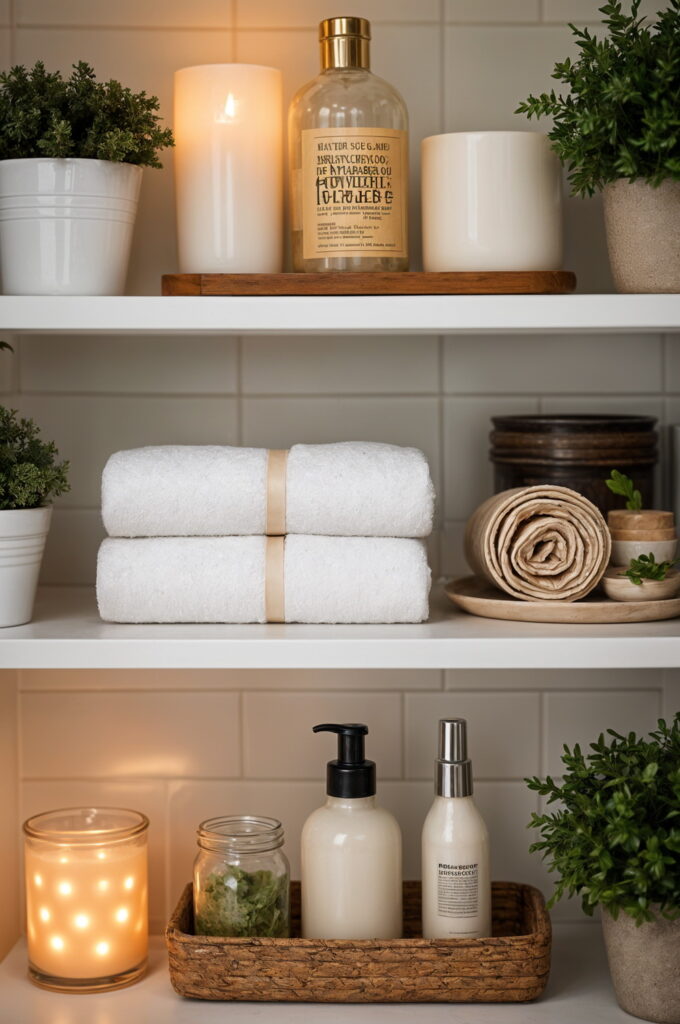
Recommended Contents:
- Rolled white towels
- Glass jars for cotton and swabs
- Attractive bottles for toiletries
- Plants that thrive in humidity
- Simple storage baskets
When it comes to bathroom shelves, it’s important to account for humidity. We always recommend selecting materials that can withstand moisture and keeping electronics or items prone to damage off open shelving in these spaces.
Keeping Your Shelves Looking Their Best
No matter how beautiful your shelving arrangement is, regular upkeep is essential to maintain its appeal. Here are some tips to ensure your shelves always look their best:
Routine Cleaning
| Room | How Often | Special Tips |
|---|---|---|
| Kitchen | Weekly wipe-down | Watch for grease and splatters |
| Living Room | Dust every two weeks | Rotate books occasionally |
| Bathroom | Weekly deep clean | Check for water damage |
| Office | Monthly tidy-up | Prevent paper pile-ups |
Seasonal Updates
Refreshing your shelves regularly keeps them interesting:
- Quarterly Declutter – Remove anything that’s no longer needed or doesn’t fit
- Seasonal Touches – Add items that reflect the time of year (spring flowers, autumn textures)
- Color Tweaks – Change accent colors to match the season
- Reevaluate Use – Move items around as your needs change
It’s a great idea to snap photos of your shelves once you’re happy with how they’re styled. These pictures can act as a helpful guide for future rearranging and make it much easier to update your shelves with seasonal changes.
Timeless Shelf Styling Advice
Based on extensive experience arranging shelves in a variety of settings, these guidelines have proven time and again to create attractive and easy-to-maintain displays:
1. Arrange Similar Items Together
Grouping alike items creates a cohesive look:
- Stack books by size or color
- Cluster ceramics in matching tones
- Organize glassware by type or style
2. Leave Some Space
Avoid the temptation to cover every bit of shelf space. Leaving some open areas between objects creates visual breathing room, making the arrangement more striking and easier on the eyes. Often, paring down your display—even just slightly—leads to a more refined and elegant look, a strategy that clients may hesitate to try at first but ultimately come to value.
3. Mix Beauty with Utility
The most effective shelving arrangements strike the right balance between style and function:
- Top shelves: Perfect for displaying decorative accents or items you don’t use often
- Middle shelves: Great for combining everyday essentials with decorative pieces
- Bottom shelves: Best suited for frequently used, practical items
4. Use the Power of Three
For tricky shelf styling situations, the rule of three offers a dependable framework:
- Start with a main anchor item (the largest or most prominent piece)
- Add a secondary piece (medium-sized, related but different)
- Finish with a small accent (the smallest item, bringing in a unique detail or texture)
This simple approach works well for almost any shelf style or arrangement.
Real-Life Shelf Success Stories
Streamlined Urban Kitchen
A homeowner with a compact urban kitchen faced the challenge of maximizing storage without creating visual clutter. To address this, we decided to display only white dishware on the open shelves, moved all brightly colored pots and pans to the lower cabinets, and introduced just a couple of small plants for a touch of greenery. After three years, she still finds this streamlined approach easy to maintain, crediting its simplicity for keeping the space tidy and manageable.
Kid-Friendly Living Room
For a household with young kids, we outfitted the lower shelves with durable baskets to hold toys, while the upper shelves were set aside for more fragile decor. The middle shelves became a spot for children’s books, which the parents switch out seasonally. This setup keeps the area organized and practical, while also making it easy to refresh the look for the whole family.
Sources:
Open shelving: benefits, drawbacks, and practical tips
https://www.architecturaldigest.com/story/kitchen-organization-ideas-to-maximize-storage-space
Expert advice and real-life examples for open kitchen design
https://www.elledecor.com/design-decorate/g60815683/open-kitchen-ideas/
Professional organizer recommendations for shelf storage and maintenance
https://www.housebeautiful.com/shopping/home-accessories/g61427526/celebrity-organizer-favorite-products/